Start Modding
Step 1
Mod Creation Guide: MCreator & Blockbench
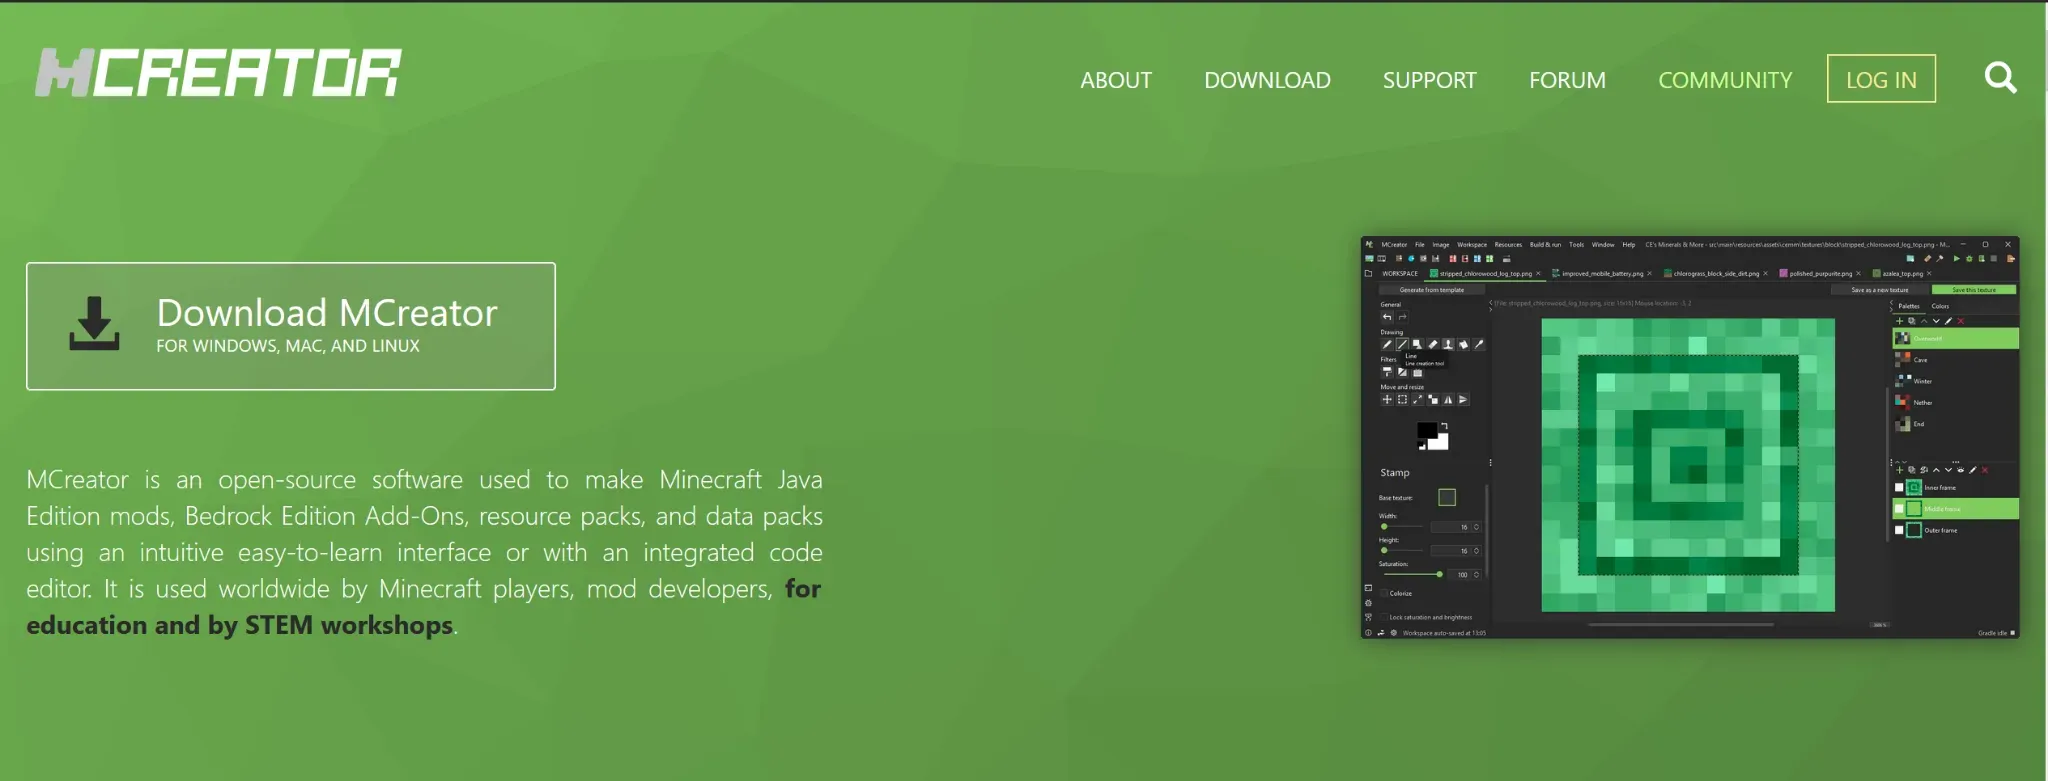
If you want to get started in Minecraft modding without having to write thousands of lines of code, MCreator and Blockbench are the essential tools.
Here's how to install them and why they're essential for your project.
Why use these tools?
MCreator (The "Brain"): This software allows you to create the mod's logic (new blocks, biomes, dimensions, or powers) through a visual interface. It's perfect for those who want to learn programming concepts intuitively.
Blockbench (The "Body"): This is the industry standard for pixel-art-style 3D modeling. It is used to physically design the appearance of new monsters (mobs), objects, or armor that will then be brought to life using MCreator.
Installation Procedure
1. Install MCreator
Visit the official website: Go to mcreator.net. Download the executable: Choose the version compatible with your operating system (Windows, macOS, or Linux). Initial Setup: Upon first launch, the program will automatically download the necessary components (such as the Java JDK). This process may take a few minutes depending on your connection. Workspace Creation: Click "Create New Workspace" to start your first project.
2. Install Blockbench
Visit the official website: Go to blockbench.net. Choose the mode: You can download the desktop application (recommended for stability) or use it directly from your browser.
3. Planet Minecraft (For texture)
It's the largest community.
In the "Texture Packs" section, its users can find thousands of packs.
Why use it: You can download specific packs (e.g., "Faithful" or "Steampunk") and analyze the sword .png files before editing them on Blockbench.
Link: planetminecraft.com
How do they work together?
The synergy between the two is simple: you create the 3D model and animations in Blockbench, export it as a Java or JSON file, and import it into MCreator. From there, you can decide whether that model should be a scary boss, a pet, or a new legendary mineral.
Step 2
Creating Your First Sword with MCreator
If you want to create a custom weapon quickly and without leaving the MCreator environment, this is the right procedure.
We'll use the integrated Texture Maker to manage the aesthetics and the Tool Editor for statistics.
1. Creating the Texture (The Visual Appearance)
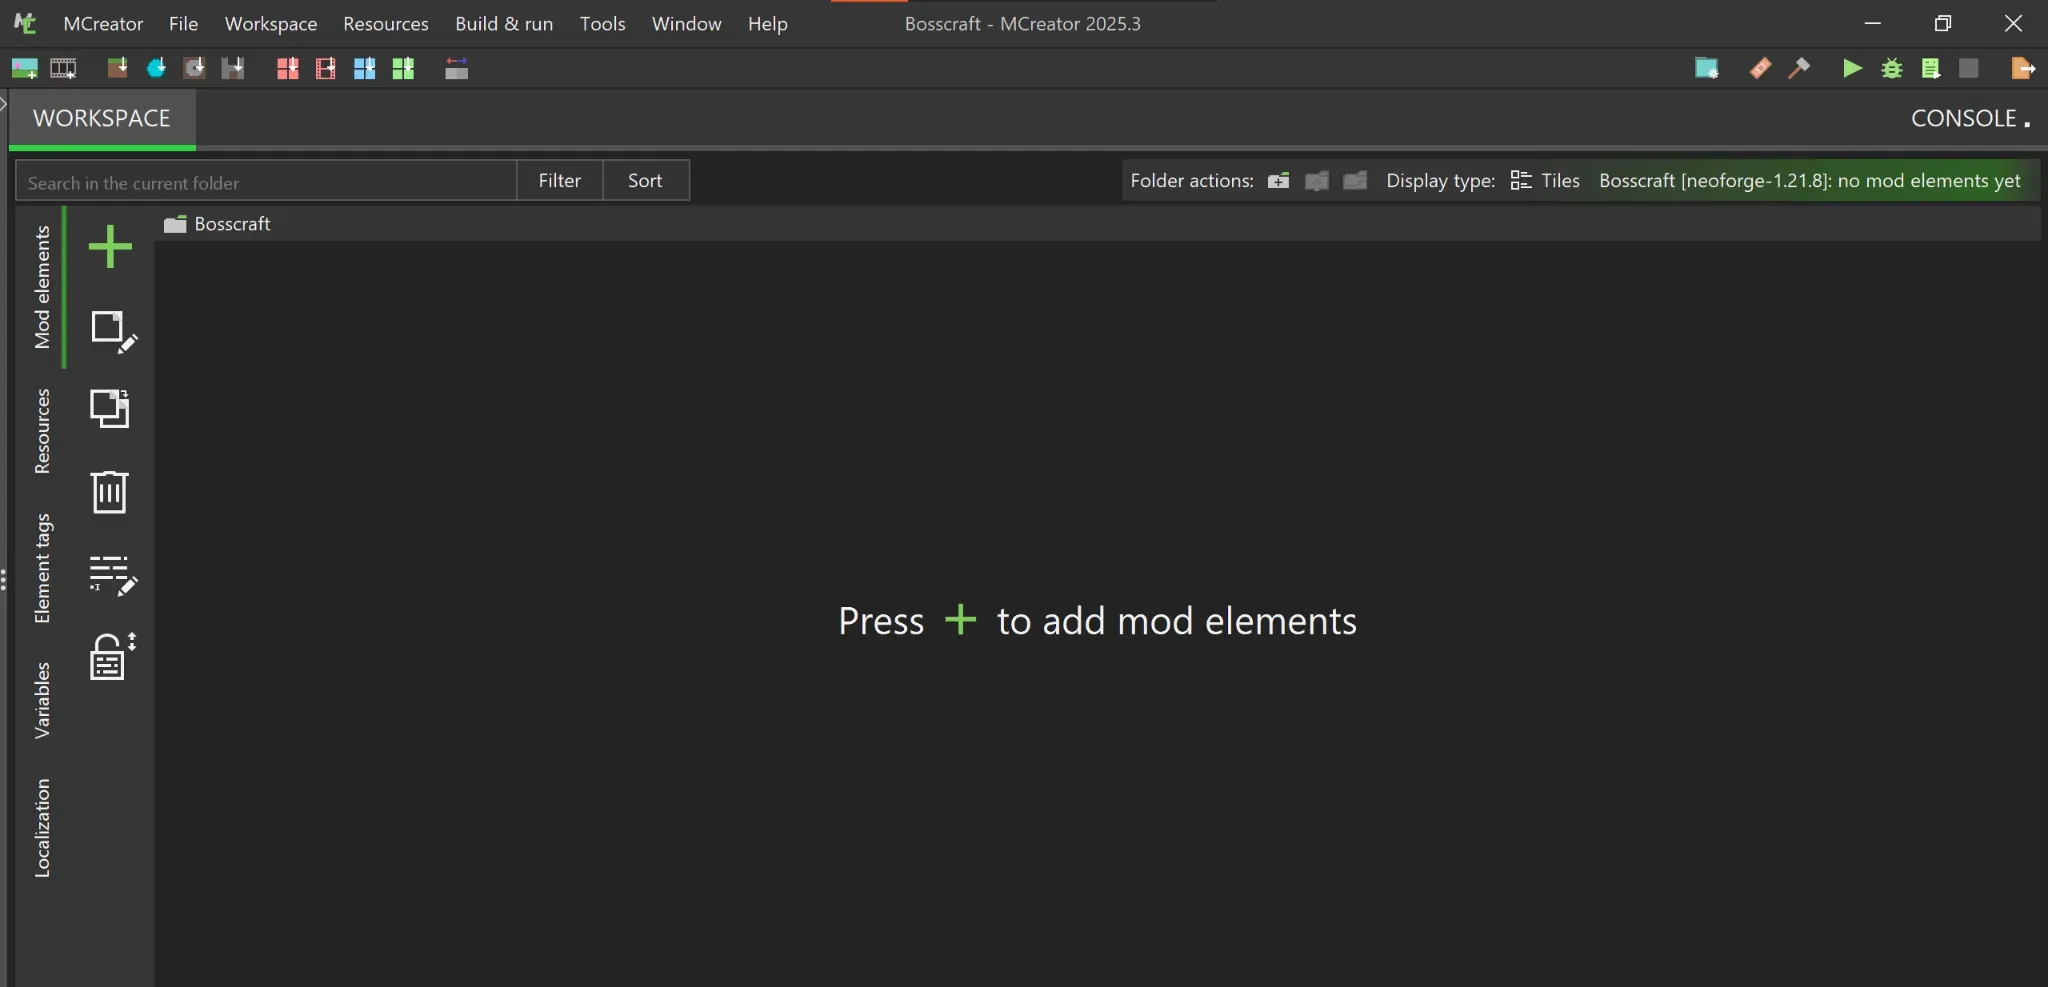
There's no need to use external graphics programs; MCreator has a powerful built-in texture generator. In the top bar, click Resources.
Select Create texture and then Create texture from scratch. In the window that appears, choose the resolution (standard 16x16 for a classic Minecraft style).
Use the Colorize tool to customize the colors of your blade. Once finished, click Save this texture and save it as an "Item" type with a name of your choice (e.g., legendary_sword).
2. Configuring the "Tool" Element
Once the texture is ready, we need to instruct the game how the weapon should behave. Return to your Workspace and press the + button (Add new element). Select the Tool item. Enter the name of your item (remembering not to use spaces, for example: Hellsword). In the Visual tab: Click the Item texture box and select the texture you just created in the previous step.
3. Defining Statistics (Properties)
By moving to the Properties tab, you can make your sword unique by adjusting these values: Type: It's essential to select Sword from the drop-down menu. Creative Inventory Tab: Choose which inventory category the weapon will appear in (usually Combat).
Harvest level: Enter 3 or 4 if you want the sword to be as powerful as diamond or netherite. Efficiency: For a sword, this value can be low (6), as it's not useful for mining blocks.
Attack speed: For a balanced sword, we recommend a value of 1.6. Damage vs. entities: This is the base damage. For example, enter 8.0 for a sword that deals a lot of damage. Number of uses: Define the durability (e.g., 1,500 uses before breaking).
4. Saving and Testing
Once you've configured all the options, click the green Save mod element button at the bottom of the page.
Testing tip: Press the green triangle icon (Play) in the top right. MCreator will start a dedicated Minecraft session where you can immediately test whether your new sword deals the correct damage and whether the texture appears as desired.
Remember:
If the texture appears as a purple and black square, make sure you saved the file correctly in the 'Item' folder and not in 'Block'!